


How to enable Nvidia G-Sync

Posted by Oriccabattery01
from the Business category at
26 Apr 2025 09:31:25 am.
Share this page: 


 </DIVicture>
(Image credit: Nvidia)
Sometimes despite having high frames or ahigh refresh rate monitor, games can still look choppy and an easy way to resolve this issue is by enabling G-Sync. For those who are unsure of how to enable G-Sync, we’ll be covering everything from what you need to step-by-step instructions.
G-Sync is a technology that matches your frame rate in game with the refresh rate of your monitor. There are many benefits to enabling G-Sync, including no screen tearing, reduction in stuttering and less input lag. For those wondering how to enable G-Sync, it’s worth noting that you need anNvidia GPUin order to do so.
When considering how to enable G-Sync, the process is very simple and once you’ve enabled it once, you won’t need to constantly keep switching it on.
The technology can make for a much more pleasant gaming experience and with less input lag, it can even make you better at games.
>>>Replacement battery for Fujitsu FPB0361S FPCBP595 CP813800-01
Tools and requirements
- PC or laptop with Nvidia graphics card
- Nvidia Control Panel software
- Up-to-date graphics card drivers
- G-Sync capable monitor
Steps for how to enable Nvidia G-Sync
- Open up your Nvidia Control panel
- Under Display hit the Set up G-Sync option
- Tick the enable G-Sync box and select whether you want it to enable for full screen mode or both windowed and full screen mode and which display you want to change
>>>Replacement battery for Fujitsu LifeBook U937 U938 U939 U939X
Step by step guide on how to enable Nvidia G-Sync
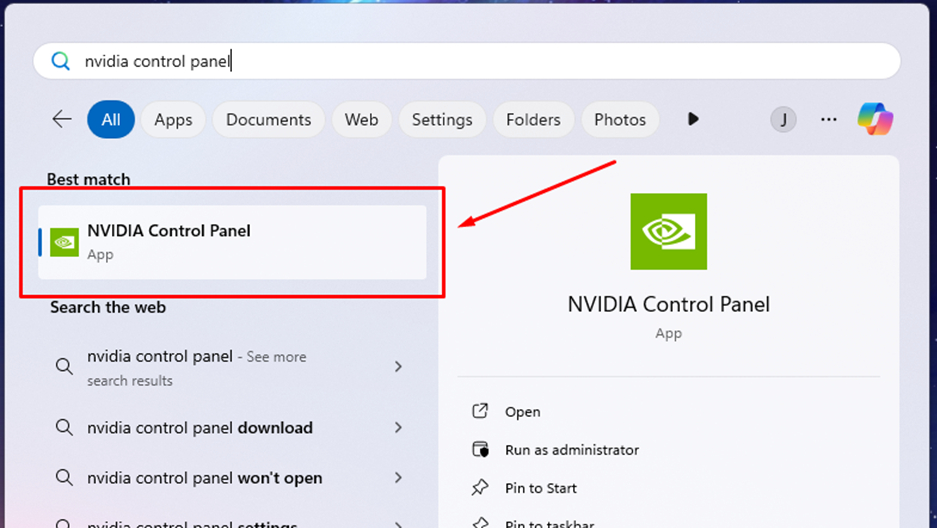
Open up your Nvidia control panel, you can search for this in your taskbar or Start menu.
You can also open it by right-clicking on your desktop, selectShow more optionsand selectNVIDIA Control Panel.
</section>
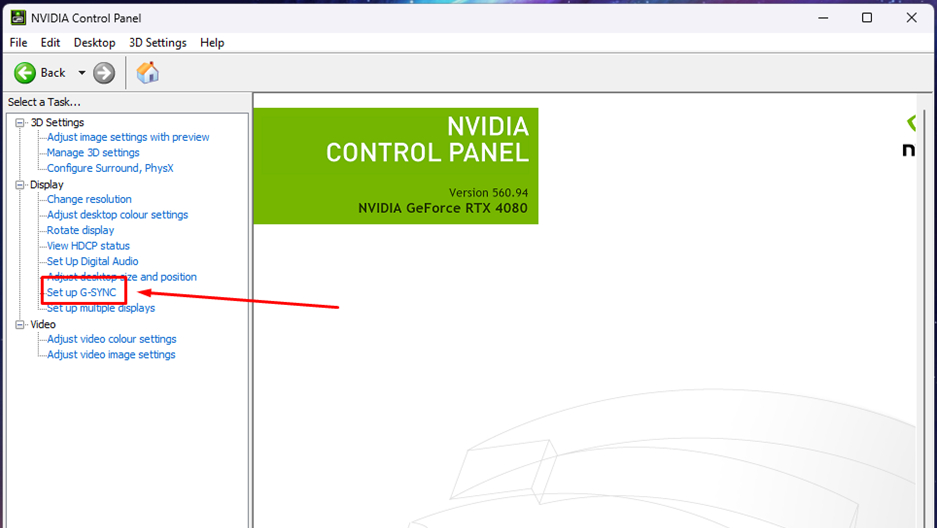
Once the control panel window opens, under the Display category, hit theSet up G-SYNCoption.
</section>
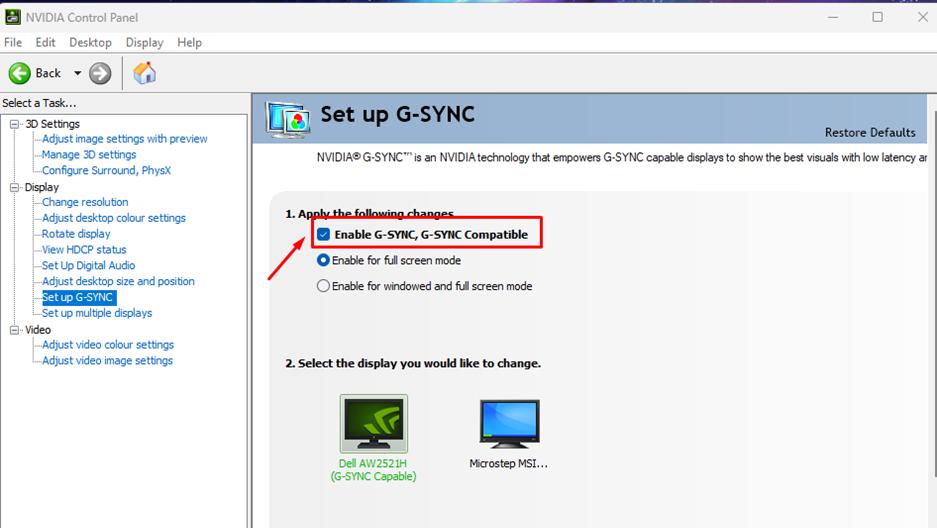
Check theEnable G-SYNCbox. If it’s greyed out then you may not have a G-Sync-compatible display or GPU.
</section>
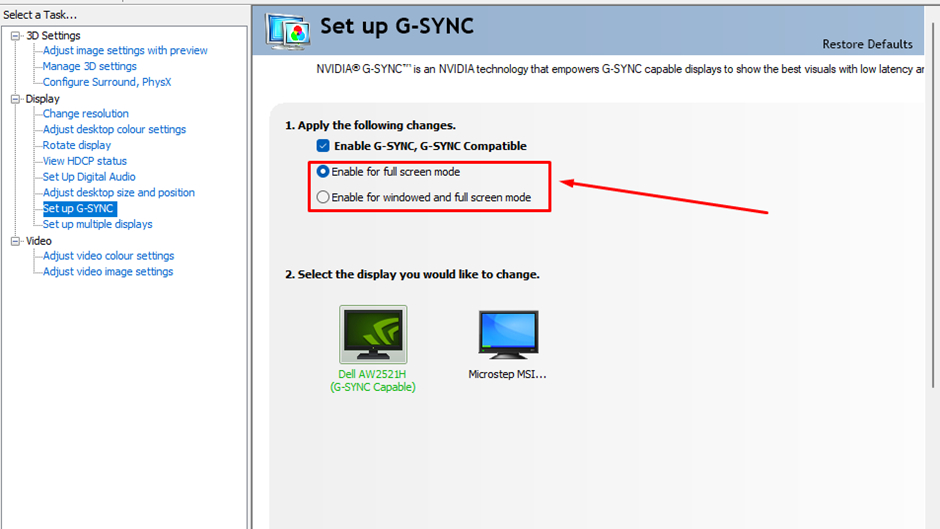
Select whether you want to enable G-Sync for when apps are in fullscreen mode or both windowed and full-screen modes. This will be based on whether or not you play games in windowed mode.
</section>
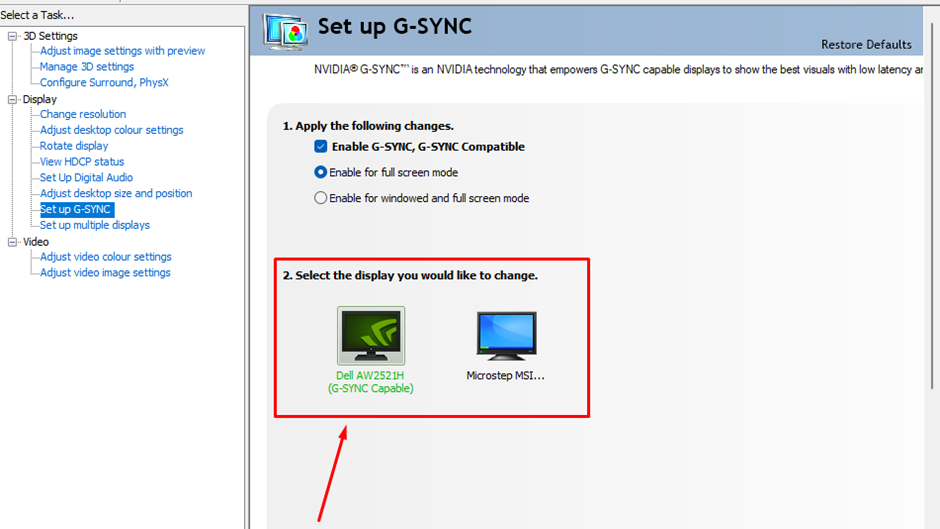
If you have multiple monitors, then choose which display you want these settings to apply to. This will be the display that you play games on or your primary monitor.
>>>Replacement battery for Fujitsu LifeBook U7312 U7412 E4412 E5412A E5412
</section>
Final thoughts on enabling Nvidia G-Sync
Overall, usingNvidia’s G-Sync technology is a great way to make for the smoothest and most pleasant gaming experience.
By syncing up your frame rate and refresh rate, you don’t have to worry about screen tearing or stuttering.
Another great benefit of enabling G-Sync technology is that it can lead to less input lag, making for quicker reactions that can mean the difference between life and death in competitive games.
<figure>
</figure></section>
<figure>
</figure></section>
<figure>
</figure></section>
</section>
Tags: Nvidia G-Sync
0 Comments